Monthly Archives: November 2011

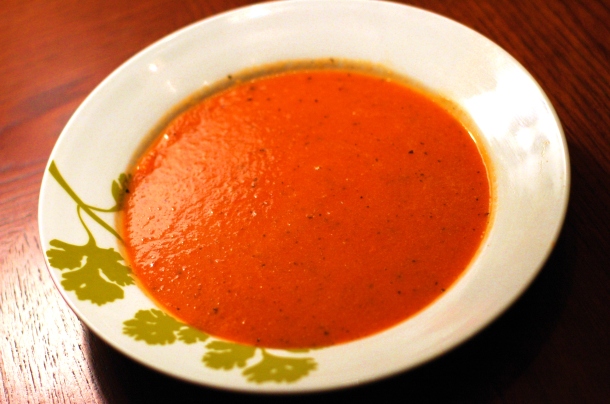
Spring Dogs Love Tomato Soup. They Hate Citrus. Recipe: Tomato Soup

Posted on

Almost everyone claims that grilled cheese goes best with tomato soup.  As a kid though, I NEVER wanted tomato soup with grilled cheese.  I don’t know if my parents didn’t like tomato soup or what, but we never had it with grilled cheese so I just assumed for years that I didn’t like it.  In fact, until a year or two ago I don’t believe I actually had a bowl of tomato soup in my life.  Now, I am not one of those people who craves tomato soup, but this colder weather has me in the mood for something warm and comforting.  A couple weeks ago Alyssa and I went to Spiro’s in Iron Mountain and I ordered a Dr. Pepper braised short rib grilled cheese sandwich.  It was fantastic and I am pretty sure I asked Alyssa why more restaurants don’t put grilled cheese on the menu.  It is one of the ultimate comfort foods and so simple to make.  The next two days we made grilled cheese and I put some of my beer braised chuck roast in mine.  That weekend rekindled my love of grilled cheese and this week I was in the mood for them again.  As I was cruising Serious Eats I came across a recipe for Nordstrom’s Tomato Basil Soup. Bells went off in my head: warm, comforting, and supposedly the perfect companion to grilled cheese.  Remember, I am not one to crave tomato soup, but according to the recipe, this soup has a cult-like following.  It looked easy enough with just a few ingredients and it was something I could whip up fairly quickly.  So here it goes.

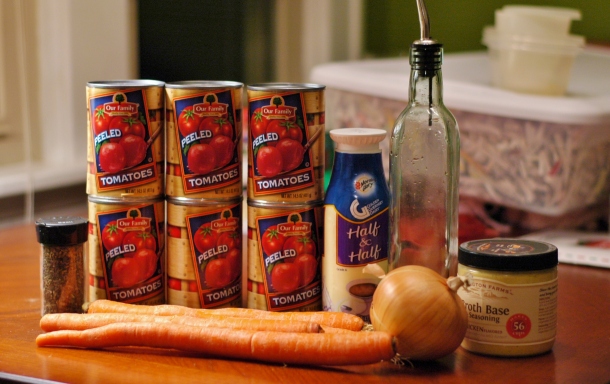
Gather the gang for a pool party.

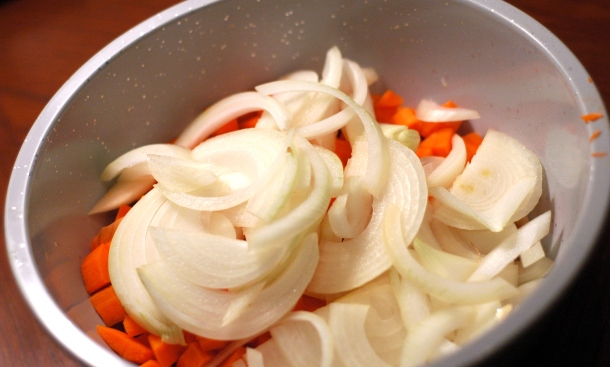
Chop up some aromatic vegetables.

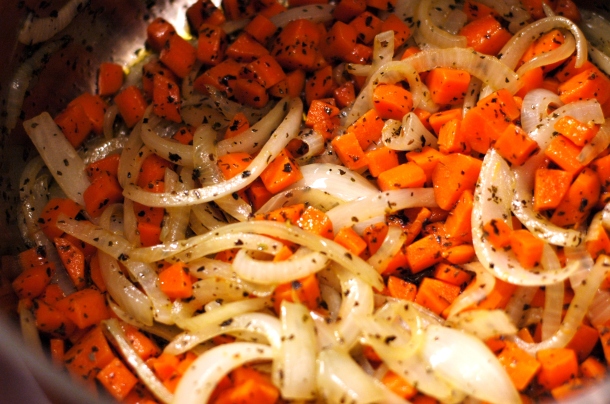
Let them get nice and cozy with some aromatic herbs.

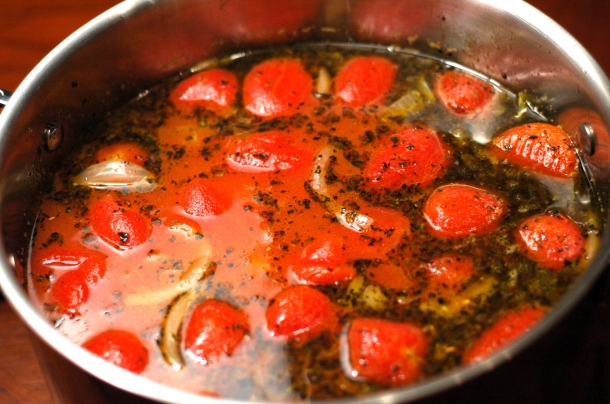
Add EVERYBODY to the pool.

Simmer, cool, blend, add cream, simmer, serve, enjoy.

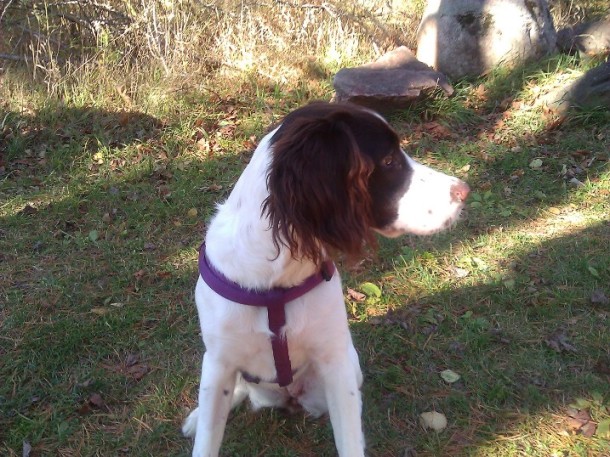
This soup is fantastic.  Ellie gave it 4 paws up, in fact she has been trying her hardest all night to get the leftovers as they cool on the counter.  Though, she does not like grapefruit peels (I had to test the theory that dogs don’t like citrus).  I won’t join the cult of Nordstrom Tomato Basil Soupeans after eating it tonight, but it is a great side dish to a grilled cheese on delicious natural starter home baked bread (which I will post about in the future).

Recipe: Tomato Soup (adapted from Serious Eats)

  • 6 tablespoons olive oil
  • 4 large carrots, peeled and diced
  • 1 large onion, sliced
  • 1 tablespoon dried basil, crushed
  • 3 28-ounce cans whole peeled Roma tomatoes
  • 1 quart chicken broth
  • 1 pint heavy cream (we used half and half, and probably only 10-12 oz.)
  • Salt and pepper to taste
  1. In a large, heavy saucepan, heat the olive oil over medium-high heat until shimmering. Add carrots and onion and cook until beginning to soften, 10 minutes, then add basil and cook until vegetables are completely soft, about 5 minutes more.

  2. Add tomatoes and broth, bring to a boil, then reduce heat and simmer 20-30 minutes, or up to 45 minutes if time permits.

  3. After allowing soup to cool somewhat, purée in a blender or food processor until smooth, doing so in batches if necessary. For a much silkier texture, strain the purée before returning to the pot (we didn’t strain it, the texture just added to the comfort factor).

  4. Stir in cream little by little over over low heat, until desired texture is reached and soup is just heated through (we used about 10-12 oz). Season to taste with salt and pepper, and serve warm.

Recipe: Grapefruit Brûlée

Posted on


Tonight when I got out of work and walked to my car I was chilled to the bone.  It’s not even that the air was actually that cold, but it just felt colder than any day yet this fall.  As you know from a few posts ago, I love winter as much as anybody, but when it is cold and there is no snow on the ground I will definitely complain.  Alyssa is staying in Escanaba tonight because she is on call, so I had leftover porketta and some breakfast potatoes for dinner.  That warm, hearty meal didn’t warm me up all the way, nor fill me up.  I knew we had ice cream, frozen custard, frozen yogurt, and Italian ice in the freezer but on a night like tonight something cold was out.  It just so happens we bought some grapefruit last night at the grocery store, mainly for a drink I want to make this week, but also because they are one of our favorite fruits.  I think one of the reasons we like them so much is that they are at their peak during the dead of winter in the UP and it’s a mini vacation eating tropical fruit during a blizzard.  I don’t know where I came across this idea for turning a tart, cool, fruit into a warm, sweet, spicy dessert in 5 minutes or less but it is fantastic.   Everyone has probably had some grapefruit with sugar sprinkled on top which is good, but broiling it transforms the fruit into something delicious.  The tartness mellows and it becomes kind of a sweet and sour mix that makes you wonder why there aren’t many recipes out there that use grapefruit.  So here is this simple, fast, delicious, even elegant dessert that is good for you too.  All it takes is a grapefruit, brown sugar, cinnamon, and some heat.

Start with a grapefruit and get your broiler going.

Cut it in half and cut out the wedges

Sprinkle some cinnamon and a healthy pinch of brown sugar on top, put it on some sort of high heat proof pan

Pop it in under the broiler, wait 3-4 minutes until golden brown on top and pull out.

Dig in and make sure to squeeze the juice out after you eat the fruit, I will even show you the proper technique.


Grapefruit Brûlée

  • 1 grapefruit
  • a dash of cinnamon
  • 1-2 tsp brown sugar

Start with a grapefruit and get your broiler going.  Cut it in half and cut out the wedges.  Sprinkle some cinnamon and a healthy pinch of brown sugar on top, put it on some sort of high heat proof pan.  Pop it in under the broiler, wait 3-4 minutes until golden brown on top and pull out.  Enjoy.

Busy week…

Posted on

We were slacking on posting the past week. With a short work week and lots of family to see, the blog was on the back burner. We had 6 family parties in 4 days; including 3 Thanksgiving dinners on Thursday and one on Saturday. Needless to say we are stuffed to the gills after all the eating. It was great to spend time with family and friends and even more so that we didn’t have to travel to see them for the first time in 7 years for me. The long drives were definitely the worst part of coming home for the holidays. We are blessed that all four sets of our grandparents live in town so it makes seeing everyone easy for us, especially now that we live back in the area. Since last week was so busy with family and friends, this coming week we have lots of projects we want to work on before Christmas so we will share them all with you. We have decorating, table building, finished pictures of our bedroom and a crafty project up there, plus a recipe or two. I’ll leave you with a picture that sums up our week, the Spring Dog laying down for a nap at 5:00. That rarely if ever happens but she was beat after the busy week.

Krapsua and Spring Dog Coffee: Our weekend

Posted on

This weekend we were supposed to go to Milwaukee to spend a “cousin’s weekend” with Korey, Amy, Elina, Angela, and Alison, but we had things to get done around the house that we would have had to put off almost til Christmas if we went.    When we moved in there was a pedestal sink and no electrical outlets or storage in the bathroom.  This was fine when I was the only one living here all summer; I don’t need to blow dry my hair or set my makeup anywhere.  Alyssa didn’t want to go with this set up for long.  A few weeks ago we installed electrical outlets throughout the 2nd floor and I had built a towel rack earlier this fall so next up was a place for Alyssa to set her stuff.  We had ordered a vanity from True Value and Alyssa’s dad was free on Saturday to help put it in.  With Thanksgiving and a few other trips coming up in the coming weekends, cousin’s weekend was switched to vanity installation weekend.  Before we installed the vanity I had to fuel up.  I love breakfast food and one of my favorite breakfasts is krapsua.  It’s a Finnish oven pancake that is a mix between crepes, Swedish pancakes, and a souffle.  I remember we used to have it on Christmas morning every year growing up after opening presents.  I think it has been a couple years since we had kropsua on Christmas morning and I had never made it on my own until a recently, maybe a couple weeks after the wedding.  One night I was flipping through Fantastically Finnish , a cookbook my grandma had given me for Christmas a couple years ago when I came across a few recipes for Finnish Oven Pancakes.  I decided to make it the next morning and surprise Alyssa.  I wasn’t sure if she would like it but took the chance anyway. Turns out she loves it and has requested it almost every Saturday morning since.  It’s extremely easy and tastes fantastic, probably even better if you have memories of it like me, but Alyssa thinks so too.  Every kitchen I know has all the ingredients on hand so you can try it next weekend and thank me later.

Gather all of your ingredients together and preheat your oven.

Put your pan in the oven and throw some butter in while they are heating. Whisk together a couple  of beaten eggs, milk, flour, sugar, and salt until the batter is smooth.  You can use 2 cups of regular milk or one cup of milk and one cup evaporated milk or half and half.  Evaporated milk gives it more flavor I think, but use what you have.

Pour the batter into your sizzling pan and bake for 30-40 minutes.

When you pull it out it will be airy and bubbly, but it collapses on itself out of the oven.  Cut a big hunk and spread some strawberry or raspberry jam on it and slather maple syrup on top.  The only thing that makes them better is a cup of hot Spring Dog coffee to wash it down, which as promised, will make its appearance here in a few weeks.

After fueling up with krapsua and coffee we got the vanity installed with only one minor mishap.  I will post pictures of the finished bathroom once we get the new medicine cabinet installed soon.  Alyssa is very happy to have somewhere to set her stuff while she gets ready now.


Krapsua (Finnish Oven Pancake)

  • 1/4 Cup Butter
  • 2 eggs
  • 2 cups milk or 1 cup milk and 1 cup evaporated milk or half and half
  • 1 cup all-purpose flour
  • 2 tablespoons sugar
  • 1 teaspoon salt

Preheat oven to 375.  Melt butter in 2 8-inch round metal pans or a 13×9 pan (I use 2 8-inch square pans usually).  In a large bowl, with wire whisk, beat eggs and add milk, flour, sugar, and salt, beating until mixture is very smooth.  Pour batter into sizzling hot pans and bake for 30-40 minutes.  Remove from pans as soon as possible to avoid sticking.  Makes 3 large or 6 regular servings.

Another Furry Friend Friday at Fumee

Posted on

One of the best parts of working for myself is setting my own hours.  Before I opened the office I knew I wanted different hours than the standard 9-5.  Being open early in the morning and late into the evening lets me accommodate many different work schedules, and it also lets me get things done that I want to do around the house.  By far my favorite day of the work week is Friday, I know I am not alone in this though.  I start seeing patients at 6 AM and get done at 1, this lets me run errands, work on projects, and play with the Spring Dog.  On the nicer Friday afternoons Ellie and I have bonding time out in the woods, I like to call it Furry Friend Friday.  We hop in the car and head to Fumee Lake for a good hour-long trail run/walk.  Spring Dog absolutely loves being out in the woods.  The first time I took her out there I brought her leash along but wanted to see how she would do without it.  She was great, she stayed on the trail and never ran more than 20 yards in front of me.  Every so often she would stop to check that I was still coming and then she would take off down the trail wagging her butt the whole time.  After that first day she was hooked.  She knows if I put on my trail shoes and she gets her harness put on we are going to the woods and she gets super excited.  I love spending time out there with her.  We both get our exercise in and I know it’s a close second in her favorite things to do behind chasing a ball.  Here’s a video from today’s Furry Friend Friday and a picture from another day out there. Click the link to check out the video.


FURRY FRIEND VIDEO


Developing our personal style.

Posted on

Since we have a number of house projects and decorating ideas to post about in the next few weeks I thought I would write about our decorating style.  I guess the best way to describe it is a work in progress.  Since this is our first house, (watch for a tour coming up soon) we are new to the decorating game.  Living in rental apartments while we were in school we could do some personalizing, but it wasn’t the same as decorating a whole house.  For one, painting wasn’t an option and second, why put much effort into something that is very temporary.  As a result, we had a hodgepodge of “college” furniture and a select few pieces of art on the walls.  After buying our house we were very excited to put our own touch on it.  We were fortunate that the major renovations were already done when we bought it.  The kitchen, furnace, siding, windows, and air conditioner were updated in the past 3 years.  Since we didn’t have big projects staring at us we could put more of our efforts into decorating and window dressing type things.  This doesn’t mean we went hog wild, spending lots of money on furniture and accessories.  We are on a tight budget so we have had to be creative.  Plus, we didn’t necessarily know what we wanted to do with our “canvas” in many rooms.  As I said before our style is a work in progress.  This is actually a blessing.  Because we are operating on a budget we couldn’t go out and buy a coordinating set from Pottery Barn in each room to make our house look like their catalog; no matter how much we might like that.  Instead we have had to be creative and thoughtful which has allowed us to start to realize our own style rather than steal from corporate designers.  Perusing blogs has definitely helped us see what type of rooms we like and find common denominators in each of our styles.  Our work in progress style is starting to shape up and become defined.  If you HAD to pin us down I would say that we like clean, classic, but comfortable rooms with a few thoughtful uses of bright color and funky patterns.  We seem to like lots of rough textures like barnwood and burlap.  We like things that look like they are durable, mainly because they have a aged patina, some of you would call them antiques or vintage.  These pieces from older times are usually the focal point in rooms we like.  I’m not saying we want to live in an antique shop, but there are lots of things we like that you can only find at a flea market, garage sale, or thrift store.  Here are a few pictures of rooms we like.  Check out their blogs because they were our inspiration for starting Spring Dog This!

1. We love the reclaimed wood, vintage inspired lighting, and clean colors.

2. We LOVE the Petersiks, the colors, the art, the comfy chair, everything in this room

3. Shannan is Alyssa's favorite blogger and we love her style, this ladder is awesome

4. Another from Shannan. The lamp, the pillow, the blanket, the comfy chair. A great cozy spot to hang out and drink coffee.

5. Another from the Petersiks again we love the colors and the coziness. Someday I will have a space like this in my bedroom


Pictures courtesy of:

1. The Lettered Cottage

2.  Young House Love

3.  Flower Patch Farmgirl

4.  Flower Patch Farmgirl

5.  Young House Love

Yooper Holiday

Posted on


If the U.P. were its own nation, today would be a federal holiday.  As the opening day of firearm deer season, November 15th is neck and neck with Christmas, New Years, Easter, and 4th of July as the most requested days off at most businesses.  Even the school kids get today off.  Thinking back I don’t remember getting opening day off in high school.  I remember getting it off in elementary and middle school, but for some reason I think they changed it while I was in high school where we had to go to school.  At any rate I still went hunting on the weekends even if we didn’t get off.  I was never successful hunting but I always enjoyed being out in the peace and quiet of the woods reading a book.  Today with smartphones and iPads, a deer blind can be as if you didn’t leave your couch, except for the blaze orange clothing.  You can stay in touch and let everyone know how your hunt is going on Facebook, listen to music, or watch a movie.  In fact, I think this year more than ever I have seen trophy pictures on Facebook more than ever.  Many of my friends posted “daylight at the blind” pictures from the woods, my dad included.  The last time I hunted, probably 5 years ago or more now, my means of communication was a walkie-talkie and my entertainment a stack of Tom Clancy and Clive Cussler paperbacks.  The walkie-talkie could barely make it back to camp and I would use it to check in every couple of hours.  Each turn of the page was a signal to look up and check for movement.  How can you enjoy the serenity if you are checking your News Feed, texting your wife, and watching the latest season of Psych on your phone?  Maybe it’s my new-found passion for simpler times and simpler things, or maybe I just plain forgot how boring 6 hours staying quiet in the cold can be, but I would leave my phone at camp if I were hunting this year.  You can hold me to that proclamation if I go next year.  This year I can’t close the office any more than absolutely necessary, (yes I know I said before that November 15th is as necessary a day off as any to many people, but not this year) so instead of sitting in the woods I was helping patients.  I also did some painting on my morning off and will post those pictures this weekend.  I know I am not the only one who missed out on the Yooper Holiday today, since Dan is not hunting this year for the first time in his memory.  Such is the life of a newlywed, recent graduate trying to build a patient base.  Hopefully in twenty years we will both have successful practices where we can take a few days off and head to camp.  I have a feeling that no matter what technology I can have with me in my blind, I will still rather have a paperback and my own thoughts to keep me company.  That’s the way my dad, and his dad, and his dad’s dad did it in years past.  There are some places that are better off the way they were 20 years ago, a deer blind in the UP on opening day is one of them.

My backup career as a furniture maker

Posted on

Alyssa and I are in the market for some furniture for our living room, but we run into a few problems whenever we look. We see all kinds of cool vintage pieces that people find at rummage sales or thrift stores on our favorite blogs, but there is never anything good at the Re-Store or Goodwill and Craigslist in the UP is full of people wanting to make a fortune on absolute junk. Pottery Barn, Restoration Hardware, and Crate and Barrel make stuff that we would love, but it’s way out of our price range at this point. Ikea has styles we like and can afford, but the closest one is 6 hours away and their stuff is not durable. So what’s a newlywed, thrifty couple to do? Well, most of our living room is second hand. In fact we just picked up a second couch today from Alyssa parents and have another one on the way when their new set comes in. Our other option is to build our own. Maybe I am a little too ambitious, but I am going to give it a shot. With the help of a blog I found last week I am going to attempt to build a few pieces for our living room. No, I am not going to build a recliner or sectional, though Ana White does have plans for numerous sofas. I am going to start with a few easier pieces. Here’s what I am going try to build. I will post some pictures as the work comes along. Keep your eyes peeled, you might see Maki Furniture popping up in your nearest Slumberland soon if things go well.  Even the Spring Dog has something to look forward to.

Photos from ana-white.com, click to go to site.


Photos from ana-white.com, click to go to site.

Photos from ana-white.com, click to go to site.


Defending November

The decorative “in-between” season is upon us.  The fall pumpkins, leaves and gourds can still be displayed, but Halloween has come and gone, and Christmas is not too far off on the horizon.   While putting away the sparkly spiders and witch shoes, it is so tempting to bring out the new Christmas decorations.  In fact, if I had my say they would most likely already be out.  However, the hubby has stated that we are going to “defend November”…and not succumb to putting out the Christmas items just yet.   My sister, Erika, was over this past weekend and said “I think that people who have their Christmas decorations out before Thanksgiving are a little iffy.”  Iffy?!  I don’t want to be iffy.

     Nevertheless, it hasn’t stopped me from putting out a few “wintery” items.  Ready or not, winter is coming.  This little moose was too cute to pass up.  I’ve taken a liking to the website pinterest.  I might even frequent it more than Facebook!  I recommend checking it out only when you have some spare time on your hands, because it is very addicting.  It has all kinds of recipes, DIY projects, house decor ideas, etc. etc. etc.  I recently found a simple way to make a rustic looking Christmas tree:  all you have to do is take a tomato cage and wrap it tightly with white lights = cute little tree for out on the porch or even indoors!

It may be pushing it, but I also put out some pre-lit garland over our fireplace.  I must say that it looks even better with Elf playing on the TV directly above it (playing on USA, I didn’t put in the DVD!).  If this movie doesn’t get you in the mood for the upcoming holidays, I don’t know what will!  Something tells me I’m going to have a hard time holding out until after Thanksgiving, but I’m giving it a whirl.  I’ll part with one of my favorite lines in the movie…

“First we’ll make snow angels for two hours, then we’ll go ice skating, then we’ll eat a whole roll of Tollhouse cookie dough as fast as we can, and then we’ll snuggle.”

Recipe: Beer Braised Chuck Roast

Posted on

There are few people in this country that don’t like a good pot roast.  It’s almost as American as apple pie.  Reading online however, pot roast seems to be difficult for some home cooks.  Sometimes it’s bland, sometimes it’s dry, many times it’s both.  I came across this version of pot roast in GQ magazine a few years ago and have yet to be disappointed.  Instead of being a step by step recipe, it’s more like a method for getting deep, rich flavor that is perfect on cold fall or winter days.  The key step, and one that many people leave out when they make a roast is browning the meat.  Getting a good crust on the meat before roasting it is key to develop flavor.  I could go all scientific on you and describe why it makes things taste good, but I will let my favorite food site, Serious Eats, describe the Maillard Reaction instead.  Trust me, you want browned meat for great pot roast.  In this method it adds about 20 extra minutes to the process, but the vast improvement of your roast when you get done will make up for the extra time.  The rest of the method is variable depending on what you have on hand, what’s on sale at the store, or what your personal tastes are and that’s the beauty of it.  I will show you where you can change things up and give a few alternatives along the way.

Start with a 2-3 pound roast that is 2 inches or so thick.  I chose chuck roast for this but you can use any thick cut, rump roast, sirloin roast, even a rib roast.  Take your roast and cut it into fist sized chunks, obviously if you have giant hands you can go a little smaller than fists.  On my 2.5 pound roast I got 7 chunks.  Generously salt all the sides of each piece, coarse salt is better here because regular table salt tends to go overboard on the saltiness.

Salted Fists

Let the meat stand at room temp after salting for 20 minutes or so.  If you want, you can take the roast out and let it warm up before you salt and that way once you start in the kitchen you can keep going without the wait.  Peel and cut up 3-4 average carrots into pieces about the size of a pinkie, thicker carrots can be sliced in half lengthwise, or use 3/4 of a bag of baby carrots.
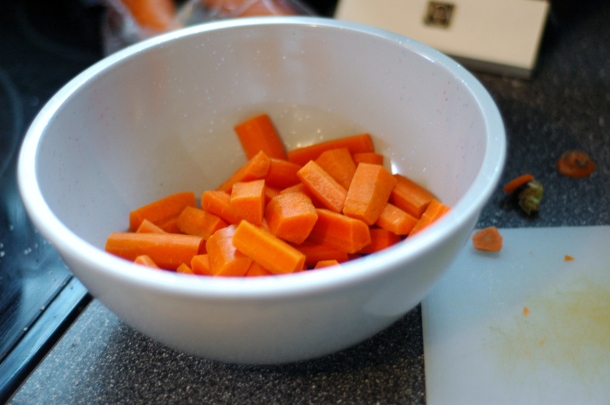
Carrots

Roughly chop a large onion.  Put the carrots and onions aside.

Carrots and onions

While the meat is resting, heat a heavy bottomed pot over medium high heat.  I love my cast iron Dutch oven for this, but any 5-8 quart pan with a lid will do.  Add a good glug of olive or vegetable oil, whatever you have on hand and let it heat up.  When the oil is shimmering add some meat, leaving space around each piece.  Usually you have to break it up into two batches to prevent overcrowding which doesn’t allow the Maillard reaction to occur.

Let the meat sear for 1-2 minutes per side until nicely browned and flip until you brown all 4 big sides of each piece.  Take the meat out and set it on a plate and continue with the next batch.  Take all the meat out of the pan and set the plate aside.

Results of the Maillard Rxn

Pour in about a half a cup of beer to the hot pan and stir rapidly with a wooden spoon scraping all the goodness stuck to the bottom of the pan.  The beer will bubble and start to reduce.  I like to use a bit of a darker beer than your typical light beer.  A pale or amber ale are my choices for this but a Miller Lite will do to if that’s all you have.  You can also use red wine, Coca-Cola, Dr. Pepper, or chicken broth with great results.
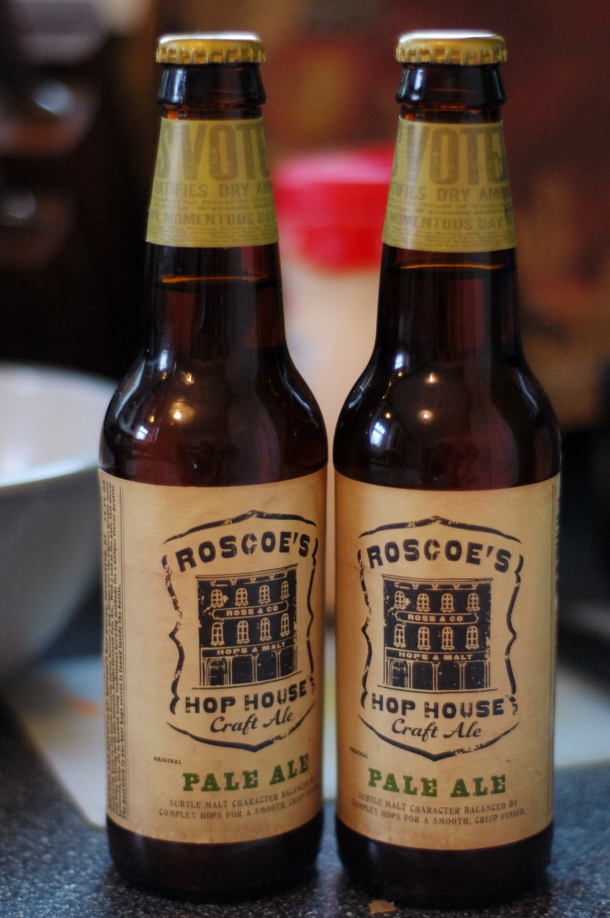
Add the onions and carrots and stir to coat with thickened beer.  Add about a teaspoon of salt and a good crack of pepper and stir occasionally, cooking about 5 minutes.  Reduce heat to low and cook 10 more minutes stirring occasionally until your onions and carrots get nice and caramelized (there’s that Maillard Reaction again).

While veggies are cooking, preheat your oven to 300.  When the vegetables are done, set the beef chunks on top of the vegetables, throw in 2-3 unpeeled cloves of garlic (or don’t, your call), a couple sprigs of parsley (rosemary works too, or a teaspoon of dried parsley or rosemary, or no herbs at all, again it’s your call), and pour in enough beer to come about half way up the sides of the meat.  I used 2 bottles of beer total today, so if you are using one of the alternatives that’s 1 bottle of wine, 2 cans of pop, or 3 cups of broth.

Put lid on pot and put in oven for 3 hours. Remove from oven, scoop out veggies and meat and put pot on a burner.  Turn heat on to medium high and bring liquid to a boil, boil til thickened about 10 minutes.  Serve by spooning “gravy” over meat.  Dig in.

Final Product

Beer Braised Pot Roast

  • 2-3 Pound Chuck Roast
  • 3-4 Carrots, Peeled
  • 1 Softball Sized Onion
  • 2 Bottles Amber Beer (1 Bottle Wine, 2 cans of regular pop, or 3 cups chicken broth can be used instead)
  • A sprig of parsley (or rosemary, thyme, or 1 tsp dried herbs)
  • Salt and Pepper
  • Olive Oil
  • 2-3 Cloves Garlic
  1. Start with a 2-3 pound roast that is 2 inches or so thick.  Take your roast and cut it into fist sized chunks.  Generously salt all the sides of each piece.  Let sit at room temperature 20 minutes while oven heats to 300.
  2. Peel and cut up 3-4 average carrots into pieces about the size of a pinkie, thicker carrots can be sliced in half lengthwise, or use 3/4 of a bag of baby carrots.  Roughly chop onion and put vegetables aside.
  3. Heat a heavy bottomed pot over medium high heat.   Add a good glug of olive or vegetable oil, whatever you have on hand and let it heat up.  When the oil is shimmering add some meat, leaving space around each piece.  It might be necessary to separate into two batches.
  4. Let the meat sear for 1-2 minutes per side until nicely browned and flip until you brown all 4 big sides of each piece.  Take the meat out and set it on a plate and continue with the next batch.  Take all the meat out of the pan and set the plate aside.
  5. Pour in about a half a cup of beer or liquid of your choice to the hot pan and stir rapidly with a wooden spoon scraping all the goodness stuck to the bottom of the pan.  Let beer bubble and start to thicken.
  6. Add the onions and carrots and stir to coat with thickened beer.  Add about a teaspoon of salt and a good crack of pepper and stir occasionally, cooking about 5 minutes.  Reduce heat to low and cook 10 more minutes stirring occasionally until your onions and carrots get nice and caramelized.
  7. When the vegetables are done, set the beef chunks on top of the vegetables, throw in 2-3 unpeeled cloves of garlic (or don’t, your call), a couple sprigs of parsley (rosemary works too, or a teaspoon of dried parsley or rosemary, or no herbs at all, again it’s your call), and pour in enough beer to come about half way up the sides of the meat.
  8. Put lid on pot and put in oven for 3 hours.
  9. Remove from oven, scoop out veggies and meat and put pot on a burner.  Turn heat on to medium high and bring liquid to a boil, boil til thickened about 10 minutes.  Serve by spooning “gravy” over meat.